Create Manifest file in Next JS from Headless WordPress (Pages Router)
This post contain affiliate links to Udemy courses, meaning when you click the links and make a purchase, I receive a small commission. I only recommend courses that I believe support the content, and it helps maintain the site.
Note: This article is for the Pages router. Not the App Router. If you are using the App Router read this.
There are several ways to generate manifest files in Next JS, the easiest is to manually create the file and drop it into the /public directory. Another is to use next-assets-manifest to dynamically generate the manifest on build.
These approaches work well for single site builds where the config file is manually updated for each site. They do not work for builds coupled to a headless CMS. In this instance a headless WordPress. The required favicon & theme colour information is stored within WordPress and has to be fetched on build.
This piece expects you to have WPGraphQL installed on your WordPress site.
TLDR
Add WordPress input fields to the WordPress Customizer. Pull the Customizer data into Next JS using WPGraphQL and return as JSON within a manifest.json file via a proxy.
What is a Manifest File?
Before getting into the technicalities it is worth going over what a manifest file is, and why your site may (or may not) need one.
A manifest file is a simple JSON file that tells the users browser about your website, and how it should be installed on the users mobile or desktop device. The term ‘installed’ means that your site can be used as a PWA (progressive web app). There is a great article by Google on what a PWA is. I would recommend reading that if you are not sure.
Do I need a Manifest File?
Do you want users to be able to install your website as an app? Do you have a need for this? Will it help with conversions? If you answered no to these questions then you don’t need a manifest file.
That said – it doesn’t hurt to have a manifest file added in case you change your mind and need this information in the future.
How to name a Manifest file
Manifest files can be named in a number of different ways. The most common is manifest.json. However the specificiation suggests naming the file .webmanifest.
This means you are likely to come across files named like site.webmanifest, or app.webmanifest. Don’t be confused by these varieties – they all do the same thing.
Requirements
We need to pull data from WordPress, inject it into a manifest file, and then serve it from ‘/manifest.site’ (or similar).
The data to be sourced from WordPress is:
- Site Name
- Site Description
- Theme Colour
- Background Colour
- Favicon Files
To make a more ‘full’ manifest file more data could be pulled from WordPress, but this works for our simplified example. If you are interested in seeing what can go into a manifest file take a look at this breakdown manifest members on Mozilla.
Looking at the list of requirements, not all of these are provided out of the box by WordPress. Theme and Background Colour will need to be added with custom functionality.
Adding Meta Fields to WordPress Customizer
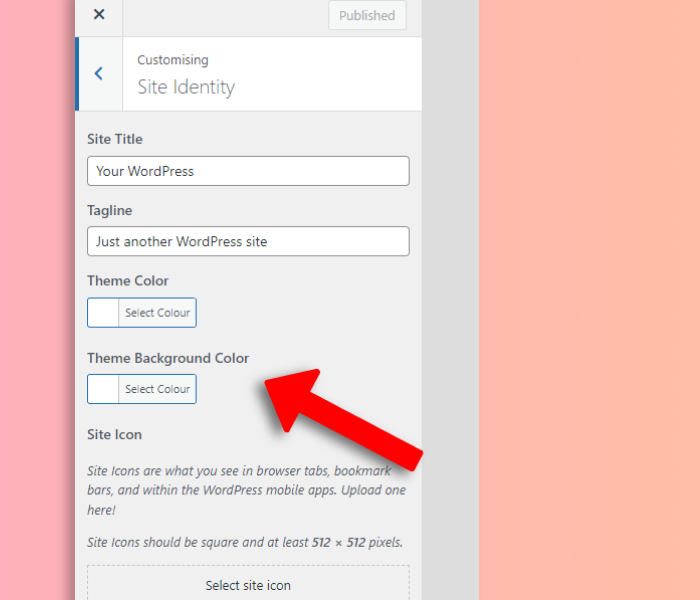
The WordPress site name, description and site icon (favicon) information can all be added and edited within the Customizer section of WordPress. With this in mind it makes sense to add the theme colours meta fields into the WordPress Customizer as well. Keep everything under the same roof.
Add the below code to the WordPress functions.php file.
function headless_customizer_add_colour_picker( $wp_customize ){

    // Add Theme Colour Setting
    $wp_customize->add_setting( 'headless_theme_colour', array(
        'default' => '#ffffff',
        'sanitize_callback' => 'sanitize_hex_colour',
    ));

    // Add Theme Colour Control
    $wp_customize->add_control( new WP_Customize_Color_Control( $wp_customize, 'my_headless_theme_colour', array(
        'label' => 'Theme Colour',
        'section' => 'title_tagline',
        'settings' => 'headless_theme_colour',
    )));

    // Add Theme Background Colour Setting
    $wp_customize->add_setting( 'headless_theme_background_colour', array(
        'default' => '#ffffff',
        'sanitize_callback' => 'sanitize_hex_colour',
    ));

    // Add Theme Colour Background Control
    $wp_customize->add_control( new WP_Customize_Color_Control( $wp_customize, 'my_headless_theme_background_colour', array(
        'label' => 'Theme Background Colour',
        'section' => 'title_tagline',
        'settings' => 'headless_theme_background_colour',
    )));

}

add_action( 'customize_register', 'headless_customizer_add_color_picker' );
Now if you navigate to ‘Appearance -> Customize’ admin screen you will see these two new fields under “Site Identity”.
Now these custom fields need adding to the WP GraphQL endpoint. Add the following code into the WordPress functions.php file.
function add_headless_homepage_settings_query() {

	register_graphql_field(
		'RootQuery',
		'siteIcon',
		[
		'type' => 'MediaItem',
			'description' => __( 'The icon set in the customizer', 'YOUR_WORDPRESS_DOMAIN' ),
			'resolve' => function() {

				$icon_id = get_option( 'site_icon' );

				if ( ! isset( $icon_id ) || ! absint( $icon_id ) ) {
					return null;
				}

				$media_object = get_post( $icon_id );
				return new \WPGraphQL\Model\Post( $media_object );

			}
		]
	);

	register_graphql_field(
		'RootQuery',
		'themeColor',
		[
		'type' => 'String',
			'description' => __( 'The theme color in the customizer', 'YOUR_WORDPRESS_DOMAIN' ),
			'resolve' => function() {
				$color = get_theme_mod( 'headless_theme_color', '#ffffff' );
				return $color;
			}
		]
	);

	register_graphql_field(
		'RootQuery',
		'themeBackgroundColor',
		[
		'type' => 'String',
			'description' => __( 'The theme background color in the customizer', 'YOUR_WORDPRESS_DOMAIN' ),
			'resolve' => function() {
				$color = get_theme_mod( 'headless_background_theme_color', '#ffffff' );
				return $color;
			}
		]
	);

}
add_action( 'graphql_register_types', 'add_headless_homepage_settings_query' );
Getting the WordPress Data into Next JS
This article expects you to already have some sort of auth flow set up for making requests to your WordPress instance. The below walks through the basic set up for grabbing the data. On a production site it should be properly protected.
Add the data sourcing
First the data is sourced from WordPress.
export async function getManifestProps() {
    const res = await fetch('YOUR_WORDPRESS_WPGRAPHQL_URL', {
        body: JSON.stringify({
            query: `
                query Manifest {
                    siteIcon {
                        mediaDetails {
                            sizes {
                                sourceUrl
                                width
                            }
                        }
                    }
                    themeColor
                    allSettings {
                        generalSettingsTitle
                    }
                }`
        })
    });
    const data = await res.json();
    return data;
}
Add the Proxy API
Now create a page called manifest-proxy within the /pages/api folder. This means the above function can be called as a server function.
Add the following code into this new page:
export default async function proxy(_, res) {
    res.setHeader('Content-Type', 'application/json');
    res.setHeader('Cache-Control', 'max-age=60');

    // Remember to import this from wherever you have save your function.
    const manifest = await getManifestProps();

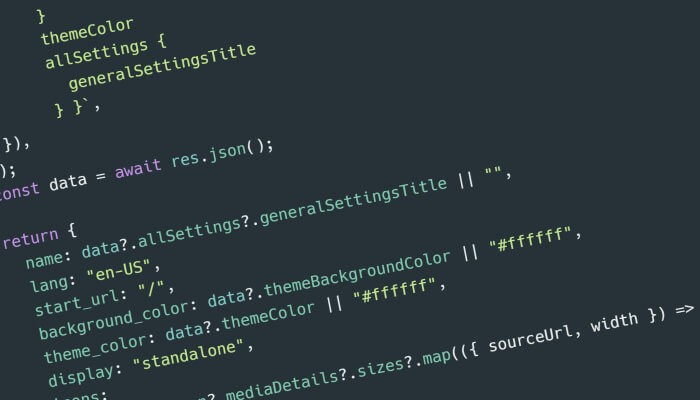
    const manifestTemplate = {
        name: manifest?.allSettings?.generalSettingsTitle || '',
        lang: 'en-US',
        start_url: '/',
        background_color: manifest?.themeBackgroundColor || '#ffffff',
        theme_color: manifest?.themeColor || '#ffffff',
        display: 'standalone',
        icons:
            manifest?.siteIcon?.mediaDetails?.sizes?.map(
                ({ sourceUrl, width }) => ({
                    src: sourceUrl,
                    sizes: `${width}x${width}`,
                    type: 'image/png'
                })
            ) || []
    };

    res.send(manifestTemplate);
}
Add the Rewrite
The next step is to make sure that Next JS knows which URL to pass through the proxy. For this it needs a rewrites function adding to the next.config.js.
This will look like:
async rewrites() {
        return [
            {
                source: '/manifest.json',
                destination: '/api/manifest-proxy'
            },
        ];
    }
This function should be added within module.exports.
What this does is target the /manifest.json URL and passes it through the proxy.
Add the manifest file to the <head>
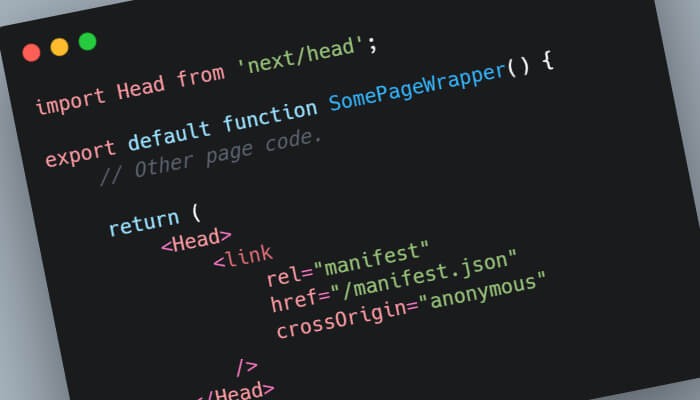
The final step is to make sure the browser knows where to look for this custom manifest file. To do this, use the Head component from Next JS to add the URL.
import Head from 'next/head';

export default function SomePageWrapper() {
    // Other page code.

    return (
        <Head>
            <link
                rel="manifest"
                href="/manifest.json"
                crossOrigin="anonymous"
            />
        </Head>
    );
}
Hopefully this helped you, and if you have any questions you can reach me at: @robertmars
